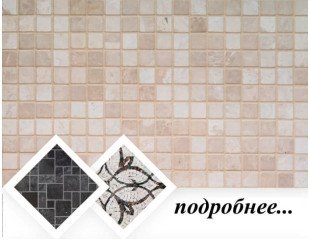
Travertine Tile Installation Technology
Travertine tile installation is not just a finishing task but a precise process of working with natural stone that reacts to substrate quality, moisture, temperature changes, and everyday use. Mistakes made at this stage rarely appear immediately. More often, after several months, microcracks, chipped edges, or hollow sounds underfoot begin to show.
Travertine has a porous, layered structure, which requires a different approach compared to porcelain stoneware or dense marble. Speed is not the priority here. Proper substrate preparation, correct adhesive selection, and constant geometry control determine the final result. Even the direction of natural veins matters, especially on large surfaces.
Practical experience confirms that long-term durability depends entirely on strict adherence to technology. When installed correctly, travertine tile withstands temperature fluctuations, regular wet cleaning, and daily foot traffic while maintaining its visual balance.
Travertine tile installation: the main challenge lies in combining the stone’s porous structure with strict substrate requirements. Natural travertine solves the task of creating a durable and visually warm surface only when the installation process is fully respected. As a result, the owner gets a stable finish without detachment, staining, or premature wear.
1. Travertine properties as a facing material
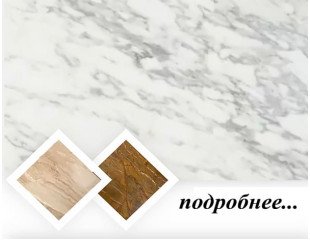
Travertine forms naturally through mineral water deposits, which explains its distinctive porosity and non-uniform structure. These pores can enhance visual depth, but they also demand careful handling during installation. The stone actively interacts with moisture and adhesive compounds.
Unlike dense stone types, travertine requires full and even adhesive support across the entire tile surface. Spot bonding is unacceptable. Even small voids beneath the tile can lead to cracking under load over time.
Surface finish plays a significant role. Polished travertine is less forgiving to substrate imperfections, while honed or brushed finishes better conceal minor irregularities. Tile format directly affects installation tolerances.
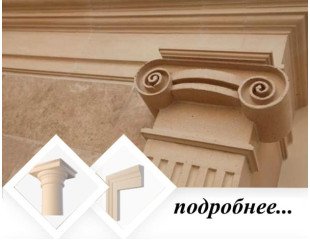
Travertine is often compared to solutions such as natural stone veneer, but their installation technologies differ fundamentally and should never be substituted.

2. Substrate preparation before installation
The substrate under travertine must be not only level but also structurally stable. Any residual movement, moisture, or uneven strength creates internal stress within the stone. Cement-sand screeds are commonly used and must be fully cured.
Substrate moisture is never judged by touch alone. A surface may feel dry yet still contain moisture that later migrates into the stone, causing dark stains. This effect is especially noticeable on light-colored travertine.
Priming is carried out in two stages: first a deep-penetrating primer, followed by an adhesion-enhancing layer. Skipping or saving on this step often leads to rework. In areas with variable humidity, this is critical.
For exterior applications, substrate requirements are even stricter than those for paving stones, as travertine is more sensitive to freeze–thaw cycles.
3. Adhesive selection and tools
Travertine requires specialized low-water-release adhesives designed for natural stone. Standard tile adhesives often cause uneven darkening of the surface. Adhesive color also matters, with light formulations being preferred.
The notched trowel size is chosen according to tile dimensions. Larger tiles require higher ridges. Adhesive is applied both to the substrate and the back of the tile to ensure full contact.
All tools must be clean. Sand, dust, or dried adhesive residues create point loads under the tile. In high-traffic areas, this later results in hollow sounds and accelerated wear.
In terms of material approach, travertine installation is close to working with marble products, but tolerances are stricter due to the stone’s porous nature.

Installer observation: most travertine issues do not appear in the first season but after temperature changes, when hidden voids beneath the tiles begin acting as stress points.
The second stage of travertine tile installation focuses on precision, timing, and understanding how natural stone behaves after placement. This phase determines whether the surface will remain stable over time or gradually develop visible defects under daily use.
4. Joint formation and surface alignment
Joints in travertine installation serve more than a visual purpose. They compensate for thermal movement and moisture variation. Eliminating joints or making them too narrow increases internal stress within the stone. In most cases, a joint width of 2–3 mm is considered optimal, adjusted to tile size.
Spacers or wedges are mandatory, even with calibrated tiles. Natural stone rarely has perfect geometry. Without consistent spacing, joints drift, which becomes especially visible under side lighting when shadows accentuate uneven lines.
Flatness is checked continuously, not after completing an entire row. Minor height differences become noticeable underfoot and accelerate wear in high-traffic areas such as hallways and kitchens.
For complex zones like entrances and stair landings, it is useful to review real-world examples from the project gallery, where joint behavior can be evaluated under long-term use.
5. Filling pores and grouting
After installation, travertine requires filling of its natural pores. This is done using specialized fillers or during the grouting process if a combined approach is chosen. Leaving pores open allows dirt and moisture to accumulate rapidly.
Grout selection depends on both color and composition. Overly rigid grouts can damage pore edges, while softer mixes may wash out during cleaning. Work proceeds in small sections with immediate removal of excess material.
Clean water is essential during this stage. Cloudy water leaves residues that harden on the surface and are difficult to remove later. In warm conditions, setting times shorten, requiring careful pace control.
Errors made here often lead to corrective work handled through professional restoration services.
Protective surface treatment
Impregnation is applied only after adhesives and grout have fully cured. Protective treatments reduce water absorption and simplify maintenance while preserving the stone’s natural appearance.
The product is applied evenly, avoiding puddles. Excess material causes visible marks after drying. A noticeable odor is common, so ventilation is required during application.
In high-load areas, protective treatment is renewed every few years. This is particularly important for floors exposed to abrasive sand and moisture.

6. Common mistakes during travertine installation
The most frequent mistake is inadequate substrate preparation. Unevenness, residual moisture, and weak adhesion rarely cause immediate failure but lead to gradual damage that requires removal.
Another issue is incorrect adhesive choice. Universal adhesives ignore stone porosity and often cause surface staining that cannot be fully removed without refinishing.
Rushing the process is equally harmful. Travertine requires full curing time at each stage. Skipping pauses causes the stone to shift after installation is complete.
Such defects are typical on sites where natural stone guidelines were ignored.
7. Use and maintenance after installation
During the first weeks, travertine is especially sensitive to moisture and contamination. Only neutral, non-acidic cleaners should be used. Sand and fine debris must be removed promptly.
When protective treatment is applied correctly, daily maintenance becomes straightforward. The surface retains a warm tactile feel, noticeable even during cooler seasons.
Local damage can often be repaired without replacing the entire surface. Individual tiles may be removed and reinstalled if the original installation was done properly.

| Parameter | Correct installation | Improper installation |
|---|---|---|
| Substrate | Dry and stable | Moist or uneven |
| Adhesive | Stone-specific | Universal |
| Joints | Compensating | Minimal or absent |
Practical advice: if tapping the surface produces a uniform dull sound, it indicates full adhesive contact without voids beneath the tiles.
Mini case: in a private residence, travertine tiles were installed with full curing times respected. After five years of active use, the floor shows no cracks or color loss.
- Travertine requires full adhesive coverage.
- A dry, stable substrate is essential.
- Joints protect against thermal stress.
- Protective treatment simplifies long-term care.
FAQ
Can travertine be installed over underfloor heating?
Yes, travertine is suitable for underfloor heating systems when installed correctly. The substrate must complete a full heating and cooling cycle before installation, and the system should be activated gradually to avoid thermal shock.
Is pore filling mandatory for travertine?
In most cases, yes. Filled pores reduce moisture absorption and staining. However, some decorative designs leave pores partially open, accepting more demanding maintenance.
Is travertine suitable for bathrooms?
Travertine works well in bathrooms when proper waterproofing and protective treatment are applied. On one hand, it creates a warm atmosphere; on the other, it requires periodic protection renewal.
Can travertine be installed without professional experience?
Technically possible, but risky. Natural stone installation demands material knowledge and discipline. If uncertain, professional consultation is recommended at +380(50)433-01-01.
Which adhesive is best for travertine?
Use stone-specific adhesives with low water release. They prevent discoloration and ensure even bonding across the tile surface.
When can the surface be walked on after installation?
Light foot traffic is typically allowed after 24–48 hours. Full load should wait several days, depending on adhesive type and site conditions.
How should travertine be cleaned in daily use?
Use neutral, non-acidic cleaners. Regular removal of abrasive particles and timely renewal of protective treatments help preserve the stone’s appearance.
What should be done if stains appear?
Identify the stain type first. Grease, mineral, and organic stains require different removal methods. In complex cases, professional cleaning is recommended to avoid surface damage.